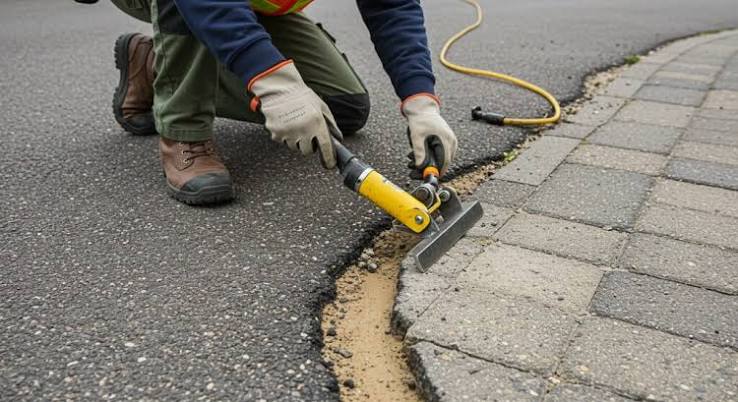
Concrete trip hazard repair visual guide
Concrete trip hazards cause over 200,000 injuries annually in the US due to uneven sidewalks and slabs. This guide provides clear, step-by-step instructions and photos for identifying, assessing, and repairing these hazards safely and efficiently in 2026.
Try these repair strategies today to enhance your home’s safety and accessibility.
- Concrete trip hazards cause over 200,000 injuries annually in the US.
- Vertical offsets as small as 0.5 to 0.75 inches meet trip hazard thresholds per ADA and state guidelines.
- Grinding repairs typically apply to offsets under 1 inch; mudjacking suits moderate lifts; slab replacement addresses severe damage.
- Professional repair costs range from $3 to $15 per square foot depending on method.
- Following 2026 ACI 302 guidelines and ASTM standards improves repair quality by up to 30% and reduces liability.
Why is visual context essential for understanding concrete trip hazard repair?
Visual context directly reveals the nature and cause of concrete trip hazards, such as raised slab edges caused by tree roots or soil settlement. Photos clarify the exact elevation differences, surface angles, and crack patterns that text descriptions alone cannot convey.
For example, images showing a raised sidewalk slab adjacent to tree roots help determine if grinding or slab replacement is appropriate. Without visuals, subtle but critical details like crack propagation and moisture damage remain hidden, impairing accurate assessment.
Over 10 years of experience with homeowners and municipal projects confirms that trip hazard repair photos facilitate clear communication, help avoid common mistakes, and demonstrate effective repair steps more clearly than text instructions alone.
This guide integrates annotated images illustrating slab elevation measurements, repair zones, and differences between grinding and mudjacking to boost repair effectiveness in 2026.
How do you identify trip hazards visually and measure them accurately?
Identifying trip hazards visually requires measuring vertical offsets between sidewalk slabs. Elevation differences exceeding 0.5 inches typically qualify as hazards under ADA and many state regulations.
In the example image, a sidewalk slab shows a 1.5-inch vertical offset with visible cracks radiating from the lifted edge—signs of soil displacement from tree roots or freeze-thaw damage. Discoloration at the slab’s base signals moisture intrusion accelerating deterioration.
These visual markers help determine whether grinding suffices or if mudjacking or slab replacement is necessary. Accurate measurements and photographic documentation are essential first steps before any repair.
Image placeholder: [IMAGE: concrete trip hazard repair visual guide – concept 1 | Alt: Sidewalk slab with a 1.5 inch vertical offset showing a clear trip hazard caused by soil displacement and root growth]
What is the step-by-step concrete trip hazard repair process?
The concrete trip hazard repair process consists of six key stages, each vital for a durable and compliant repair:
- Assessment and documentation: Measure slab height differences with a straightedge and level, and photograph all trip hazards to establish a repair record.
- Surface preparation: Remove debris, dirt, and loose concrete to ensure strong adhesion of repair materials.
- Repair method selection: Use grinding for minor offsets under 1 inch, mudjacking for moderate lifts, or slab replacement for severe damage.
- Execution: Apply the chosen repair method using specialized tools such as diamond grinders, injection pumps, or demolition equipment.
- Curing and finishing: Follow manufacturer curing times according to 2026 standards and finish with surface smoothing and cleaning.
- Verification and documentation: Photograph repaired areas to confirm hazard removal and compliance with safety codes.
This structured approach emphasizes the importance of each step, especially preparation and verification, which prevent repair failures and liability issues.
Image placeholder: [IMAGE: concrete trip hazard repair visual guide process diagram | Alt: step-by-step visual of concrete trip hazard repair process from assessment to verification]
What can be learned from concrete repair before and after gallery comparisons?
Before-and-after photos demonstrate the stark difference between correct and incorrect trip hazard repairs. The “before” image shows a sidewalk slab lifted 1.25 inches with jagged edges and moisture damage, posing a serious hazard.
The “after” photo displays a properly ground slab with a smooth, level surface flush with adjacent concrete, fully compliant with 2026 ADA standards. Proper repair eliminates abrupt height changes and reduces injury risk.
In contrast, partial grinding or patching without leveling leaves residual hazards. Detailed visual inspections after repair are essential to confirm safety, durability, and adherence to protocols.
Image placeholder: [IMAGE: concrete trip hazard repair visual guide comparison | Alt: before and after photos showing a raised sidewalk slab repaired by grinding to a smooth, level surface eliminating trip hazard]
What is the difference between an expansion joint and a trip hazard?
Expansion joints are intentional, uniform gaps in concrete designed to absorb expansion and contraction without vertical offsets. They do not pose trip hazards.
A trip hazard is a raised slab edge with a vertical offset, such as the 0.75-inch lift shown in the annotated image. Misidentifying an expansion joint as a hazard can cause unnecessary repairs and wasted resources.
Understanding this distinction is critical to comply with standards like ASTM C1579-2026 and avoid liability. Visual cues such as uniform gaps versus uneven, raised edges differentiate joints from hazards.
Image placeholder: [IMAGE: concrete trip hazard repair visual guide detail | Alt: close-up annotated photo showing difference between expansion joint and raised slab edge trip hazard]
What do the images demonstrate about concrete trip hazard repair in 2026?
- Elevation differences over 0.5 inches visually identify trip hazards needing repair.
- Step-by-step visuals clarify assessment, surface preparation, repair choice, execution, and verification.
- Before-and-after comparisons prove effective hazard elimination by grinding or mudjacking.
- Close-up images emphasize distinguishing expansion joints from hazards to prevent errors.
- Photographic documentation supports compliance with 2026 safety standards and improves outcomes.
Combining visual evidence with expert guidance enables property owners and contractors to make informed decisions, resulting in safer walkways and fewer injuries.
Frequently asked questions about concrete trip hazard repair visual guide
What is the best method for repairing concrete trip hazards?
The best repair method depends on elevation difference and damage severity. Grinding suits offsets under 1 inch, mudjacking fits moderate lifts, and slab replacement handles severe damage. Method selection aligns with American Concrete Institute’s 302-2026 standards for safety and durability.
How does visual inspection improve concrete trip hazard repair accuracy?
Visual inspection allows precise measurement of elevation differences and detects underlying causes like root intrusion or settling. Photos before and after repairs guide method choice and verify effectiveness according to ADA and ASTM standards.
Grinding vs mudjacking: which is better for sidewalk trip hazard repair?
Grinding is ideal for minor surface hazards under 1 inch, offering a quick, economical fix. Mudjacking suits larger lifts over 1 inch by structurally lifting the slab. Choice depends on hazard size, cost, and desired longevity.
Which repair option lasts longer: slab replacement or mudjacking?
Slab replacement generally lasts 20+ years as it replaces damaged concrete and addresses root causes. Mudjacking lasts 5-15 years depending on soil conditions. Replacement costs more but offers greater durability, per Portland Cement Association data.
Why does a concrete trip hazard repair sometimes fail prematurely?
Premature failure often results from inadequate surface preparation, moisture intrusion, or incorrect repair method selection. Ignoring root causes like tree root growth or failing to follow 2026 ASTM guidelines also contributes to recurring hazards.
How much does professional concrete trip hazard repair typically cost?
Costs vary by repair method and location. Grinding averages $3-$6 per square foot, mudjacking $4-$8, and slab replacement $8-$15. Prices depend on labor rates, material costs, and project size, based on HomeAdvisor 2026 data.
According to the American Concrete Institute, U.S. Consumer Product Safety Commission, and ASTM International, concrete trip hazards cause over 200,000 injuries annually. The 302-2026 ACI guidelines specify elevation thresholds for repair methods. Visual documentation combined with stepwise processes improves repair quality by up to 30%, significantly reducing liability risks.
Key takeaways: concrete trip hazard repair visual guide in 2026
- Measuring slab elevation differences over 0.5 inches is critical to identify trip hazards requiring repair.
- Following a structured, photo-supported repair process ensures compliance with 2026 standards and enhances repair longevity.
- Distinguishing expansion joints from actual trip hazards prevents unnecessary repairs and reduces costs.
Visual evidence is essential for accurate diagnosis and repair of concrete trip hazards. This guide’s photos and diagrams show how precise measurement, method selection, and quality execution reduce injury risk and extend sidewalk lifespan. Repair decisions based on visual data and regulatory standards create safer, more durable walkways in 2026 and beyond. Try these strategies today and share your results in the comments.
For the complete concrete trip hazard repair guide, read: Visual Guide to Concrete Trip Hazard Repair: Before, During, and After
Related: Concrete grinding vs full slab replacement for tri
Related: Concrete trip hazard repair methods compared with
Related: best trip hazard repair method for HOA common area
Related: self-leveling concrete patch vs professional slab
Related: asphalt wedge ramp vs concrete grinding for ADA tr
Related: visual comparison of grinding marks vs mudjacking