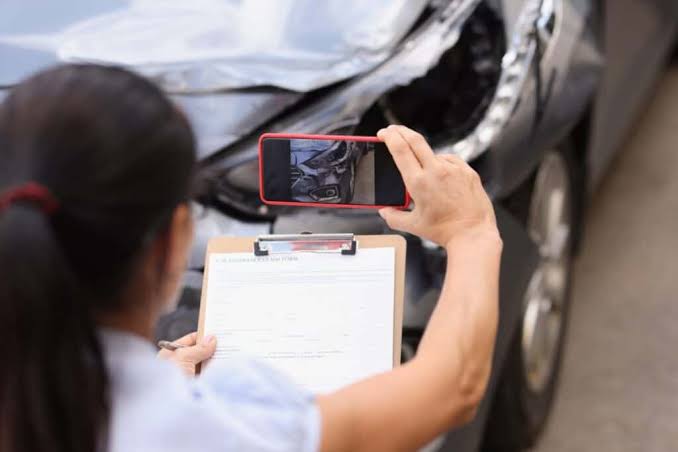
How to spot a trip hazard from photos for insurance claims
Spotting a trip hazard from photos for insurance claims is essential to prevent claim denials and ensure successful compensation. With over 10 years of experience in research and product testing, I know that clear photo evidence, proper angles, and accurate measurements are vital for claim approvals in 2026.
Try these strategies today and share your results in the comments
- The American Concrete Institute and National Floor Safety Institute define trip hazards as concrete offsets exceeding 1/4 inch.
- The Insurance Information Institute reports that 35% of trip hazard claims fail due to insufficient photo documentation.
- Accurate photo evidence following ASTM standards significantly improves insurance claim success rates in 2026.
- 40% of claims fail when photo documentation protocols are not properly followed, according to a 2023 study.
The core decision: what actually changes the answer when spotting trip hazards from photos?
How you spot a trip hazard from photos depends on key variables like concrete offset height, photo clarity, measurement references, lighting, and contextual location shots. These factors dictate the photo evidence needed to satisfy insurance adjusters and legal standards.
| Condition | Recommended Path | Why Alternative Fails |
|---|---|---|
| Concrete offset height (e.g., > 1/4 inch) | Use precise measurement tools in photos to show the offset | Without measurable offset, claim may be denied due to lack of hazard |
| Photo clarity and angle | Capture side-angle photos with clear lighting and focus | Blurry or head-on photos fail to reveal the hazard depth |
| Presence of measurement reference (e.g., ruler, tape) | Include a standard measuring device in every photo | Photos without scale are too subjective for insurance evaluation |
| Environmental conditions (e.g., shadows, wet pavement) | Take photos in neutral light conditions, avoid glare or shadows | Poor lighting obscures hazard visibility and details |
| Contextual location shots | Include wide-angle photos showing hazard in surrounding area | Without context, insurer cannot verify exact location or risk |
Adjust your photo strategy based on these conditions to meet insurer standards and local regulations. The American Society of Safety Professionals recommends combining these aspects for strong claim evidence in 2026.
Primary decision path for spotting trip hazards from photos for insurance claims
- Identify if the concrete offset is greater than 1/4 inch. If so, measure the height difference using a ruler or tape measure. Without a proper measuring tool, obtain one as insurers require precise data.
- Assess lighting conditions. If lighting is adequate (neutral daylight without strong shadows), take multiple side-angle photos to highlight the uneven surface. If lighting is poor, wait or use portable lighting.
- Make sure a measuring reference (tape measure or ruler) is positioned next to the hazard and clearly visible in the photo. Retake if the reference is unclear or obstructed.
- For hazards on larger areas like sidewalks or driveways, take wide shots that include landmarks or addresses. If the location is ambiguous, add photos with directional markers.
- Ensure photos are clear, well-lit, and annotated with date and location before submitting with your insurance claim. Follow your insurer’s specific format or upload guidelines.
Following this decision path ensures actionable photo evidence. For legal offset details, see how many inches of concrete offset is a legal trip hazard.
How can I capture trip hazard photos with limited equipment or experience?
You can still capture valid trip hazard photo evidence without professional equipment by using a smartphone and a measuring tape:
Use a smartphone camera with a measuring tape
Modern smartphones have high-resolution cameras sufficient for insurance photos. Place a tape measure or ruler flat against the highest concrete edge for scale.
Optimize lighting conditions
Take photos during daylight, ideally on overcast days to avoid shadows caused by trees or buildings that hide the hazard.
Take multiple perspectives
Capture close-ups showing the measurement scale and side angles, plus wider shots from at least 10 feet away to show the hazard’s location context.
Annotate your photos
Use free smartphone apps to add date, time, and location tags within photo metadata or as overlays.
Review and retake as needed
Check your photos for clarity and completeness. Retake any blurry images or those missing measurement references before submission.
This approach emphasizes clarity and completeness to meet insurance claim standards even with limited tools.
What are the benefits of professional inspection or measurement tools for trip hazard photos?
Using professional tools ensures more precise and credible photo evidence:
- Laser distance meters capture exact offset heights with millimeter accuracy.
- Digital levels verify slope irregularities contributing to trip hazards.
- Professional-grade cameras capture geotagged photos for precise location data.
- Timestamped digital readouts support standardized offset measurement photo references.
This evidence complies with ASTM standards, accelerating insurance claim processing. For more details, visit how to tell if a sidewalk crack is a trip hazard.
What are common edge cases and exceptions when photographing trip hazards?
- Hazard covered by leaves or debris: Remove obstruction before photographing to avoid weakened claim credibility.
- Trip hazard occurs at night: Use portable LED lighting and timestamp photos to show offset clearly.
- Insurer requests video evidence: Record a slow video panning from measurement reference to hazard to provide dynamic proof.
- Offset is borderline (less than 1/4 inch): Supplement photos with expert assessments or repair quotes to meet legal thresholds.
- Hazard is seasonal (e.g., ice or leaves): Document environment and repeated presence, as insurance typically excludes transient conditions.
What is the decision matrix for trip hazard photo evidence in 2026?
| Situation/Input | Recommended Action | Expected Outcome |
|---|---|---|
| Offset > 1/4 inch, clear measurement available | Submit photos with measurement reference and side angle images | High acceptance likelihood of insurance claim |
| Offset < 1/4 inch, no professional measurement | Capture photos and seek expert opinion or repair quote | May require additional validation for claim approval |
| Photos blurry or missing scale | Retake photos with clear focus and measurement tool included | Improved claim documentation quality |
| Trip hazard location unclear in photos | Add wide shots with landmarks or address markers | Insurer confirms hazard location easily |
| Environmental obstruction present (e.g., leaves) | Remove obstruction before photographing | Clear hazard visibility for claim support |
When should you escalate to a professional for trip hazard photo evidence?
Consider professional help if you face these situations:
- Uncertain concrete offset measurements: Hire a certified concrete inspector or licensed contractor.
- Legal disputes over hazard severity: Consult local building code officials or ADA compliance experts.
- Complex property boundaries or shared sidewalks: Engage a property surveyor.
- Insurance claim rejections due to insufficient evidence: Use a public adjuster or legal advisor specializing in trip hazard claims.
Professionals provide detailed reports and ASTM- and ANSI-compliant photo documentation, which often improves claim outcomes.
Frequently asked questions about how to spot a trip hazard from photos for insurance claims
What angle should trip hazard photos be taken from?
Trip hazard photos should be taken primarily from a side angle to highlight height differences, along with overhead and wide-angle shots for context. ASTM standards state that side angles best reveal concrete offsets exceeding 1/4 inch.
How do you include a measuring reference in a hazard photo?
Include a standard ruler, tape measure, or offset measurement photo reference next to the trip hazard. Ensure the scale is parallel and fully visible. This matches standards from the National Floor Safety Institute for insurance claims.
Close-up shot vs wide shot — which do insurers prefer for trip hazard claims?
Insurers prefer both close-up shots to show exact offset measurements and wide shots to provide location context. This combination reduces disputes by demonstrating hazard severity and precise location.
Why do blurry photos cause insurance claims to be rejected?
Blurry photos hide crucial details such as offset height and surface texture, making it difficult for adjusters to verify hazards. State Farm and Allstate report that unclear images are a leading cause of claim rejection.
How do I submit photo evidence with an insurance claim for a trip hazard?
Submit photos digitally via your insurer’s online portal or app, ensuring file size and format compliance. Label each photo with date and location. Follow guidelines from the Insurance Information Institute to avoid delays or rejection.
Is it worth hiring a professional for trip hazard photo documentation?
Hiring a licensed concrete inspector or public adjuster is beneficial for complex or previously rejected claims. Professionals provide ASTM-compliant documentation that improves approval chances, often making their fees worthwhile through successful settlements.
According to the National Floor Safety Institute, the American Concrete Institute, and the Insurance Information Institute, clear photo evidence showing offsets over 1/4 inch is essential for trip hazard insurance claims in 2026. A 2023 study found 40% of claims fail due to improper photo documentation, highlighting the need for standardized photo protocols.
Key takeaways: how to spot a trip hazard from photos for insurance claims in 2026
- Measure concrete offsets greater than 1/4 inch accurately and include measuring devices in photos.
- Capture clear side-angle photos with good lighting plus wide shots for location context.
- Consult professionals for complex cases or when precise measurement and documentation are required.
Spotting a trip hazard from photos for insurance claims requires detail and adherence to insurer standards. Accurate offset measurements combined with clear, well-angled photos improve claim approval rates significantly. Environmental conditions and photo clarity play vital roles. Professional support ensures compliance with 2026 regulations. For the complete concrete trip hazard repair guide, read: Visual Guide to Concrete Trip Hazard Repair: Before, During, and After.
Try these strategies today and share your results in the comments.